Only three more sleeps and then we are off to the Netherlands! I can't wait to be back in my home country, see family and friends again after 2.5 years, speak Dutch all the time, ride a bike everywhere without a helmet and eat lots of Dutch cheese and licorice!We will also take the boys on a city trip to Rome for a few days, that is going to be so much fun!!
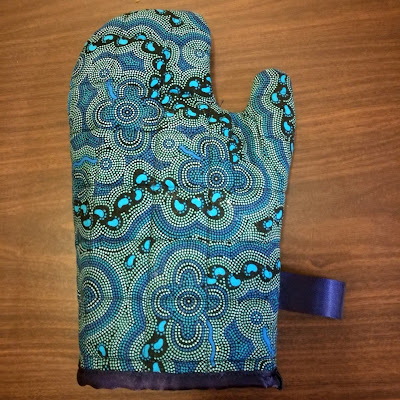
We will be staying in a few different places while we are in the Netherlands. I thought that it would be nice to have some small, handmade gifts for our hosts, so decided to use some of the Australian fabrics in my stash to whip up a few oven mitts. They're quick and easy to make - I took some pictures along the way to show you how. They make great seasonal presents as you can use any fabric you like (Christmas oven mitts? why not!)
I found some Insul-Bright heat resistant batting in my fabric cupboard (from when I made a tea cosy in 2013), which of course is great for oven mitts. I added a layer of cotton batting to get nice and thick mitts. If you don't have any Insul-Bright, two layers of cotton batting will also work.
You will need:
- two 8'' x 12'' (20 x 25 cm) rectangles of your chosen fabric
- two 8'' x 12'' (20 x 25 cm) rectangles of Insul- Bright batting
- two 8'' x 12'' (20 x 25 cm) rectangles of cotton batting
- two 8'' x 12'' (20 x 25 cm) rectangles of lining fabric
- matching or contrasting thread
- 24'' (60 cm) ribbon or double-fold bias tape
- sewing machine (a walking foot is recommended for sewing through multiple layers)
- safety pins
- binding clips

1 Use one of your oven mitts to create a template, by placing it on a piece of paper and tracing around it, adding a seam allowance of 1'' (2.5 cm). (If you don't have an oven mitt, trace around your hand with a 2'' (5 cm) seam allowance) Cut out the template.
2 Make a fabric sandwich from the following layers: the outer fabric on top, right side up; the Insul-Bright next, shiny side up; the cotton batting next, and the lining fabric at the bottom, wrong side up.
3 With the walking foot attached to your sewing machine, quilt the sandwich in horizontal and vertical lines:

4 Make a second sandwich in the same way and quilt it.
5 Pin the template to the front of one of the fabric sandwiches and cut it out.

6 Flip the template over and pin it to the front of the other sandwich. Cut it out.

7 Place both parts of the oven mitt right sides together.
8 Cut a 6'' (15 cm) piece of ribbon, fold it in half, and place it 2'' (5 cm) from the bottom edge of the mitt in the side seam between the two parts, facing inwards with the rough edges aligning.
9 Use binding clips to clip the two parts together. (pinning through so many layers is really hard!)

10. Sew all around the edges, leaving the bottom edge open. Trim the seams where necessary to reduce bulk.

11. Turn the mitt right side out. Fold the remaining ribbon around the bottom edge and sew it in place. Use one or two binding clips to keep the ribbon from moving and replace them as you go. Fold the last 1/2'' (1 cm) in for a neat finish.

12 Admire your finished oven mitt!

2 comments:
Thanks for the tutorial. Enjoy your trip !
Safe travelling and have a fantastic time!
Post a Comment